
Last Updated: January 15, 2026
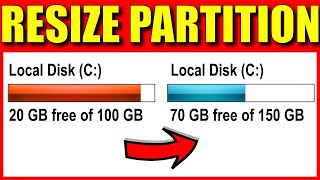
To increase the disk size where Windows 10 is installed, you will need to follow these steps. Please note that this process can be a bit involved and carries some risk, so make sure you back up your important data before proceeding.
Step 1: Backup Your Data
Before making any changes to your disk size, it’s crucial to back up all your important data to an external storage device or cloud service. This is a precaution in case anything goes wrong during the resizing process.
Step 2: Check Available Space
First, check if you have any unallocated space on your physical disk that can be added to the Windows partition. You can do this using the built-in “Disk Management” tool:
- Press Win + X and select “Disk Management.”
- Check for any unallocated space. If you have unallocated space available on the same drive, you can proceed. If not, you might need to free up space or consider using an external drive.
Step 3: Extend the Windows Partition
If you have unallocated space, you can use the following steps to extend your Windows partition:
- Right-click on the Windows partition (usually C:) and select “Extend Volume.”
- Follow the wizard to extend the volume using the unallocated space.
If you don’t have unallocated space and you want to increase the size of the partition, you might need to shrink another partition to free up space.
Keep Your Facebook Account Private and Secure
Step 4: Shrink Another Partition (Optional)
If you need to shrink another partition to free up space for your Windows partition, follow these steps:
- In Disk Management, right-click on the partition you want to shrink (make sure it’s a non-system and non-boot partition) and select “Shrink Volume.”
- Specify the amount of space to shrink, making sure you leave enough space for your Windows partition to expand.
- Once the shrink process is complete, you’ll have unallocated space.
Step 5: Extend the Windows Partition
After you have unallocated space, follow the steps in “Step 3” to extend the Windows partition using the unallocated space.
Step 6: Verify and Test
After you’ve extended your Windows partition, restart your computer and verify that the disk size has increased. Also, check that all your files and programs are working correctly.
Step 7: Clean Up
After successfully increasing the disk size, you can delete any temporary files and folders that you might have created during the process.
Remember that modifying disk partitions always carries some risk, and mistakes can lead to data loss. Be cautious and make sure to have a backup of your important data before making any changes to your disk configuration. If you’re not comfortable doing this on your own, consider seeking assistance from a professional or using third-party partition management software.